
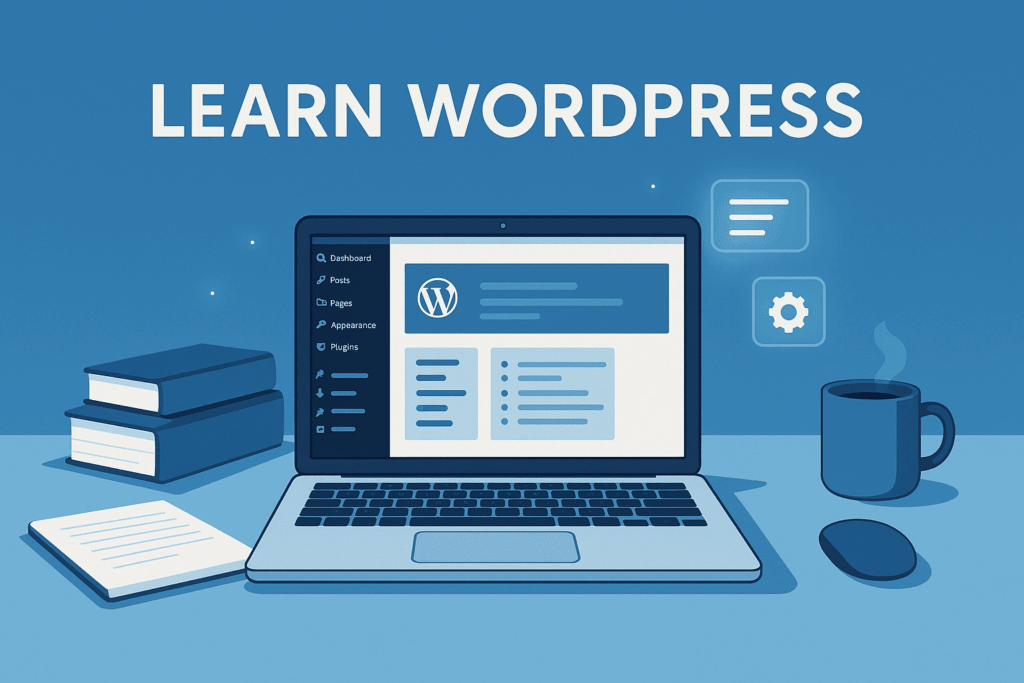
Master WordPress from Scratch: The Ultimate Beginner-to-Advanced Guide by WP Watch
Before diving into the lessons, it’s important to understand what WordPress is, why millions of people use it, and how it fits into the modern web.
WordPress is the world’s most popular platform for building websites — powering blogs, business sites, online stores, portfolios, learning platforms, and more. It’s known for being flexible, beginner-friendly, and supported by a massive global community.
Whether you’re here to build your first website, grow your business online, or develop advanced WordPress skills, this guide will walk you step-by-step from beginner to expert.
To get the most out of your learning journey, you can also explore:
- What WordPress Is & Why It’s So Popular
- Two Versions: WordPress.com vs. WordPress.org
- Setting Up WordPress: Domain, Hosting & Installation
- Navigating the Dashboard, Themes, and Plugins
- Creating Pages, Posts, Menus and Media
- Using the Block Editor (Gutenberg)
- Customising Your Site: Themes, Widgets & Beyond
- SEO Basics & Optimisation Tips
- Security, Backups & Updates
- Advanced Topics: Custom Post Types, eCommerce, Performance
- Learning Roadmap & Real-World Use Cases
- Module 1: The Core Foundation (Setup & Launch)
- Module 2: Mastering the Dashboard (Content & Appearance)
- Module 3: Essential Functionality (Plugins & Setup)
- Module 4: Security and Maintenance (Going Live)
1. What WordPress Is & Why It’s So Popular
At its core, WordPress is an open-source content management system (CMS) that enables you to build and manage websites — whether you’re a blogger, business owner, or developer.
Here’s why it stands out:
- It powers a huge portion of the web (recently over 40 % of all sites).
- It’s flexible: you can launch anything from a simple blog to a full-fledged eCommerce portal.
- It offers thousands of themes and plugins, letting you build without deep coding knowledge.
- It has a vibrant community and many free resources for learning and troubleshooting.
For WP Watch, think of WordPress as your digital building block — once you understand the pieces, you can assemble almost any kind of site you need.
2. Two Versions: WordPress.com vs. WordPress.org
One of the first decisions: which version of WordPress to use? Here’s how they differ:
- WordPress.org (“self-hosted”): You download the software and install on your own hosting. Full control, install any theme/plugin, own your data.
- WordPress.com: A hosted service that uses WordPress software behind the scenes. Simpler setup, but more limited in customization unless you pay for higher-tier plans.
For learners and anyone wanting flexibility, WP Watch recommends starting with the self-hosted (WordPress.org) version — you’ll gain more control & room to grow.
3. Setting Up WordPress: Domain, Hosting & Installation
Here’s your initial tech checklist for launching a WordPress website on WP Watch:
3.1 Define Your Goal
Before you choose domain names or hosting, ask: What do I want this website to do? Is it a blog, an online store, a portfolio, a membership hub? Your goal will guide your setup decisions.
3.2 Choose a Domain Name & Hosting
- Domain name: The web address (e.g., yoursite.com).
- Web hosting: Where your site’s files are stored (the “house” the domain points to).
New site owners often confuse the two — but they are separate.
When getting hosting, ensure it supports WordPress well (one-click installs, performance, backups).
3.3 Install WordPress
Most hosting providers offer easy installation of WordPress. After installation, you’ll log into the WordPress dashboard and begin setup.
4. Navigating the Dashboard, Themes, and Plugins
Now that WordPress is installed, WP Watch leads you through the core areas:
4.1 The Dashboard
The Dashboard (admin area) is where you control everything: content, appearance, settings, plugins. Spend time familiarizing yourself with the menu, settings, and basic options.
4.2 Themes (Visual Design)
A theme determines how your site looks. You install a theme, then modify it (colors, fonts, layout). Choose a theme that’s responsive (mobile friendly) and well-supported.
4.3 Plugins (Functionality)
Plugins are like apps for your WordPress site — they add features (contact forms, SEO tools, sliders, backups). Choose plugins that are updated regularly and compatible with your WordPress version.
5. Creating Pages, Posts, Menus and Media
Here’s how to begin adding content in WP Watch’s learning path:
- Posts: Typically used for blog entries or ongoing content — they appear in chronological order and often have categories/tags.
- Pages: Static content that doesn’t change much over time (About, Contact, Services).
- Menus: Navigation links that help visitors browse your site (header, footer, sidebar menus).
- Media: Images, videos, audio files you upload to your site. Manage via the Media Library.
Begin by creating a few pages (e.g., Home, About, Blog). Then create a sample post, upload an image, and build a menu linking your pages.
6. Using the Block Editor (Gutenberg)
The modern WordPress editor is the Block Editor (sometimes called Gutenberg). You create content by stacking “blocks” (paragraphs, headings, images, galleries, etc). WP Watch emphasizes mastering the block editor because:
- It gives you visual control over layout and content.
- You can reuse blocks, save templates, and design pages without heavy coding.
- It’s the standard editor for recent WordPress versions.
Spend time dragging in different block types, experimenting with layout, and building a page from scratch.
7. Customising Your Site: Themes, Widgets & Beyond
Once you’re comfortable with the basics, WP Watch guides you into deeper customization:
- Theme Customizer: Many themes include a customizer where you can change site title, logo, colours, typography, menus, header/footer layout.
- Widgets: Sidebars, footers, other widget-ready areas support small components (search box, recent posts, social feeds).
- Menus & Navigation: Set up primary and secondary menus, create drop-downs, ensure mobile usability.
- Child Themes or Custom CSS: For advanced tweaks, you might use a child theme or custom CSS to fine-tune design.
- Page Builders: If your theme supports it, you might use a drag-and-drop builder (like Elementor or others) for custom layouts.
8. SEO Basics & Optimisation Tips
Getting your site seen is just as important as getting it built. WP Watch covers these SEO fundamentals:
- Choose a good SEO plugin (one that helps with meta titles/descriptions, XML sitemaps, schema).
- Make sure your site is fast (page speed impacts SEO).
- Use meaningful URLs, write quality content, and ensure mobile-friendliness.
- Use internal links, alt text for images, and build inbound links when possible.
- Monitor analytics: see how visitors find you, which pages perform best, and adjust accordingly.
9. Security, Backups & Updates
Building a site is only step one — you must maintain it. On WP Watch, you’ll find:
- Updates: Themes, plugins, WordPress core must be kept up-to-date to avoid vulnerabilities.
- Backups: Regular backups (off-site or via plugin) ensure you can restore if something breaks.
- Security Tools: Use a firewall, limit login attempts, strong passwords, SSL certificate (HTTPS) for your site.
- Performance Optimisation: Clean up unused plugins/themes, optimize images, use caching, possibly a CDN (content delivery network).
These practices help keep your site safe, fast and reliable.
10. Advanced Topics: Custom Post Types, eCommerce, Performance
When you’re ready to level up, WP Watch introduces advanced features:
10.1 Custom Post Types & Custom Fields
Beyond the standard Posts and Pages, you can create custom content types (e.g., Events, Portfolios, Products) using code or plugin. This allows unique content structures suited to your project.
10.2 eCommerce with WooCommerce
Want to sell products or digital downloads? The plugin WooCommerce transforms WordPress into a full-blown online store — product pages, cart, checkout, payment gateways. Many WP Watch guides show you how to set this up.
10.3 Performance, Scaling & Multisite
As your site grows:
- Use caching and CDNs to manage traffic and speed.
- Consider managed WordPress hosting for high traffic.
- Use database optimisation and image lazy loading.
- If building multiple sites, explore WordPress Multisite features.
11. Learning Roadmap & Real-World Use Cases
Here’s how you might structure your WP Watch learning journey:
Beginner (Week 1–2)
- Set up your domain & hosting, install WordPress.
- Explore Dashboard, install a theme, upload sample content.
- Create basic pages, a blog post, menu, media upload.
- Get comfortable with block editor.
Intermediate (Month 1–2)
- Install and configure essential plugins (SEO, security, forms).
- Customize theme appearance: colours, typography, widgets.
- Start creating blog posts regularly.
- Optimize site speed and SEO basics.
Advanced (Month 3+)
- Create custom post types for specialised content.
- Launch an eCommerce store or membership site.
- Dive into custom CSS or child themes, or build your own theme.
- Monitor traffic analytics, A/B test features, scale site performance.
Real-World Use Cases
- A personal blog—with regular posts, images, comments.
- A small business website—with services page, contact form, testimonials.
- An online store—using WooCommerce, product categories, payment integration.
- A portfolio site—for creatives, showcasing projects with galleries and case studies.
- A membership or course site—restrict content, track progress, monetize access.
WordPress Mastery Modules (Step-by-Step Learning Path)
Module 1: The Core Foundation (Setup & Launch)
This module covers the critical initial decisions and technical steps required to get your self-hosted WordPress site online.
1.1 Understanding WordPress.org vs. .com
Before you start, you must understand the two versions of WordPress.
| Feature | WordPress.com | WordPress.org (Your Goal) |
| Control | Hosted by Automattic (limited flexibility) | Self-hosted (100% control) |
| Cost | Free to start, but paid plans are restrictive | Free software, but requires paid hosting and domain |
| Plugins/Themes | Restricted on lower tiers | Unlimited—install any plugin or theme |
| Monetization | Restricted advertising and e-commerce options | Unlimited—full e-commerce and ad network freedom |
1.2 Choosing & Setting Up Hosting
A quality host is the foundation of your site. We recommend Managed WordPress Hosting for beginners because it provides built-in speed, security, and specialized support.
Hosting Checklist:
- Free SSL Certificate: This ensures your site runs on HTTPS (required by Google for security and SEO). Most hosts include this for free.
- 1-Click WordPress Installer: Simplifies the setup process (covered in Step 1.3).
- 24/7 Expert Support: Critical for when you run into technical issues.
- Automatic Daily Backups: A safety net included in the managed plan.
Action: Purchase a hosting plan and a domain name (your website address) from a reputable provider.
1.3 Installing WordPress (Using the 1-Click Installer)
Once your domain and hosting are ready, installing WordPress is typically a one-click process.
- Locate the Installer: Log in to your hosting account’s control panel (often cPanel or a custom dashboard). Look for an icon or section labeled “WordPress Installer,” “Auto Installer,” or “Softaculous.”
- Start Installation: Click the “Install Now” or “Install WordPress” button.
- Configuration Settings:
- Domain: Ensure the correct domain is selected.
- Directory: Leave this field blank unless you intend to install WordPress in a subdirectory (e.g.,
yoursite.com/blog). - Admin Username & Password: Choose a strong, unique Username (do not use “admin”) and a complex password. Write these down.
- Site Title: Enter the name of your website.
- Finish: Click “Install.” The system will complete the installation in under a minute and provide a link to your admin login page.
1.4 Essential Post-Installation Tasks
These tasks harden your new installation and prepare it for growth.
- Log In: Go to your admin URL (usually
yoursite.com/wp-admin/) and enter the username and password you created. - Set Site Title & Tagline: Navigate to Settings → General.
- Update the Site Title (your brand name).
- Write a descriptive Tagline (a short description of what your site does).
- Configure Permalinks: This determines the structure of your URLs, which is vital for SEO.
- Go to Settings → Permalinks.
- Select the “Post name” option.
- Click Save Changes. (Example: This changes ugly URLs like
yoursite.com/?p=123to clean, descriptive ones likeyoursite.com/my-first-post/)
Module 2: Mastering the Dashboard (Content & Appearance)
This module gets you comfortable with the tools you’ll use daily to create and style your website.
2.1 Dashboard Navigation (The Admin Area)
The WordPress dashboard is your control center. Spend time exploring the main menu on the left:
- Posts: For timely, categorized content like blog articles or news.
- Pages: For static, timeless content like Home, About, and Contact pages.
- Media: Where all your images, videos, and files are stored.
- Appearance: Customize your site’s design (Themes, Menus).
- Plugins: Install and manage add-on features.
- Settings: Global configuration for your site.
2.2 Pages vs. Posts
| Content Type | Purpose | Example |
| Pages | Static, permanent content that usually doesn’t change and has no date. Forms your website structure. | Home, About Us, Services, Contact. |
| Posts | Timely, categorized content. Automatically includes an author, date, and categories/tags. | Blog articles, News updates, Product announcements. |
Action: Create Core Pages
- Go to Pages → Add New.
- Create and Title three pages: Home, About Us, and Contact. Leave them mostly blank for now. Click Publish on each one.
2.3 Introduction to the Block Editor (Gutenberg)
The Block Editor uses blocks for every element of your content (text, image, button, etc.), replacing the old text editor.
- Open a Page: Edit your newly created “About Us” page.
- Add a Block: Click the
+icon in the top left or anywhere in the content area. - Core Blocks Tutorial:
- Paragraph Block: Simply start typing. This is the default block.
- Heading Block: Type
/headingand press Enter. Use H2 for main sections and H3 for sub-sections (important for SEO!). - Image Block: Click the
+, select Image, and upload a photo or select one from the Media Library. - List Block: Type
/listto create bulleted or numbered lists.
- Reusable Blocks (Pro Tip): If you create a block design you want to use everywhere (like a Call-to-Action button group), click the three dots (
...) on the block toolbar and select “Create Reusable Block.” You can now insert this pre-designed element on any page.
2.4 Choosing and Activating a Theme
The theme dictates your site’s visual design.
- Browse Themes: Go to Appearance → Themes and click “Add New.”
- Selection Criteria: Filter by “Popular” and look for lightweight, multi-purpose themes like Astra, Kadence, or GeneratePress. These themes are fast and integrate well with plugins.
- Installation: Hover over the chosen theme and click Install.
- Activation: Once installed, click Activate. Your website’s public appearance will instantly update to the new theme’s design.
Module 3: Essential Functionality (Plugins & Setup)
Plugins are the engine of your site, adding features like security, forms, and SEO.
3.1 The Role of Plugins
Plugins are apps for your website. They allow you to extend WordPress’s core functionality without writing code.
The Golden Rule: Always stick to the principle of “Only install what you need.” More plugins can mean more potential security risks and slower performance.
3.2 Must-Have Plugins Installation
Go to Plugins → Add New, search for the plugin name, click Install Now, and then click Activate.
| Category | Recommended Plugin (Example) | Purpose |
| 1. Security | Wordfence Security (Free) | Firewall protection, malware scanning, and login attempt limits. |
| 2. Backup | UpdraftPlus (Free) | Simple one-click backup and restoration of your entire site. |
| 3. SEO | All in One SEO (AIOSEO) or Rank Math (Free) | Tools to optimize your content, generate sitemaps, and track search engine performance. |
3.3 Creating a Contact Form
A functional contact form is non-negotiable for a professional website.
- Install Form Plugin: Install and activate WPForms Lite.
- Create the Form: Go to WPForms → Add New. Use the simple drag-and-drop builder to select fields (Name, Email, Message).
- Configure Notifications: Go to the “Settings” tab within WPForms and ensure the notification email is set to your correct business email address.
- Embed on Page: Edit your Contact Page. Click the
+icon, search for the WPForms Block, and select the form you just created. Click Update to publish the form.
3.4 Setting Up Navigation Menus
Menus are how visitors find their way around.
- Create the Menu: Go to Appearance → Menus.
- Give your new menu a name (e.g., “Primary Navigation”).
- On the left, under “Pages,” check the boxes for your Home, About Us, and Contact pages, and click “Add to Menu.”
- Assign the Location: Under “Menu Settings,” check the box for “Primary Menu” (or similar, depending on your theme).
- Save: Click “Save Menu.” Your menu should now appear in your website’s header.
Module 4: Security and Maintenance (Going Live)
A professional site is a secure and well-maintained site. Complete this module before launching your site publicly.
4.1 Basic Security Checklist
Prevent common attacks with these foundational hardening steps:
- Strong User Accounts: Ensure your admin username is not “admin” and uses a complex password. (If you used “admin,” create a new Administrator user with a unique name, log in to the new account, and delete the old “admin” account.)
- Change the Default Database Prefix (Advanced Action): WordPress uses the default table prefix
wp_. Changing this to a random value (e.g.,a4b2c3_) deters common SQL injection attacks. Your host or a security plugin can help you safely change this. - Limit Login Attempts: Ensure your security plugin (like Wordfence) is configured to automatically lock out users after 3-5 failed login attempts.
4.2 Setting Up Your First Backup
Backups are your insurance. You must automate this process and store the backup off-site.
- Configure Remote Storage: In your backup plugin’s settings (e.g., UpdraftPlus → Settings), connect to a remote storage service like Dropbox, Google Drive, or Amazon S3.
- Set Schedule: Set the Files and Database schedules to run at least weekly (daily is better for active sites).
- Perform Manual Backup: Click “Backup Now” to create your first full, complete copy of the site (database + files). Verify the files successfully transfer to your remote storage.
4.3 Introduction to Maintenance
Maintaining your site is a non-negotiable, weekly task.
- The Priority of Updates: Updates fix security vulnerabilities and bugs. Always update immediately when new versions are released, starting with WordPress Core, then plugins, then themes.
- Safe Update Procedure:
- BEFORE updating, perform a manual backup (see Step 4.2).
- Apply updates.
- Clear your caching plugin/host cache.
- Visually inspect the front-end of your site to ensure nothing broke.
- Deleting Unused Items: Delete any themes or plugins you are not actively using. Having dormant, outdated software is a major security risk.
4.4 Going Live (The Final Check)
You are now ready to launch! Run through this final checklist.
- Check Visibility: Go to Settings → Reading. Ensure the box labeled “Discourage search engines from indexing this site” is UNCHECKED. If this is checked, Google will not find your site.
- Test Forms & Links: Fill out your contact form to ensure you receive the email. Click every link (including in the menu) to ensure they work.
- Clear All Caching: Go to your hosting panel and/or caching plugin and clear the cache one final time to ensure visitors see the most recent, non-broken version of your site.
Congratulations! Your professional WordPress site is live.